May, 2024
Copying the system datasets from the 3350 DASD, where they have been created as you followed my previous instructions, to 3390 DASD, is a simple process. I do not personally see a significant advantage in having the system datasets on 3390, and have in fact been using the system generated on 3350 DASD for decades, and will probably continue to do so. But the option is now available and it can be easily accomplished.
Following these instructions will result in migrating all the system datasets from 3350 DASD volumes MVSRES, MVS000, and SMP000 onto 3390 DASD volumes VS2RES and VS2MNT. It is still questionable if the page datasets and JES2 datasets can be migrated onto 3390. Because of when the version of JES2 we have was written, and because of the in core mapping of the spool volumes, it seems best to avoid even an attempt at placing JES2 datasets on 3390. So I have chosen to leave the paging and JES2 datasets on 3350 DASD. I have taken this opportunity to expand the spool datasets from one 3350 to three 3350 volumes, which will solve JES2 spool shortage, if you have experienced that problem. There are also adequate 3350 DASD generated into MVS to allow addition of more spool volumes, if required.
A major consideration in planning this process was that it is not possible to have two DASD volumes online with the same volume serial number. Hence the reason for the volume IDs VS2RES, PAGES0, and JES2?? for the targets that correspond to MVSRES, PAGE00, and SPOOL1.
To avoid being unnecessarily redundant, I am only going to list one item here -
You should have created the new MVS 3.8j system on four 3350 DASD volumes: MVSRES.3350, MVS000.3350, SPOOL1.3350, and PAGE00.3350 - also located in the dasd directory.
Although not mandatory, this is the structure into which I have MVS related files and these instructions will show commands, output, etc. using this relative structure as a reference point:
I am providing a new archive which contains the jobstreams, scripts, and Hercules configuration required to complete the migration and IPL MVS following the migration. Do not download both of the files below. It is only necessary to download the file below that is correct for your Operating System.
For Linux host Operating Systems, download ../archives/mvsMigrate3390.tar.gz (10 kB) [MD5: 34e6c4c2db103e82f899a99ee159a8aa].
For Windows host Operating Systems, download ../archives/mvsMigrate3390.zip (11 kB) [MD5: fc0335f1ac330d7847fa28ffe8799197].
This archive contains files only used for this set of instructions. The six items in the archive are:
For Linux host Operating Systems, mvsMigrate3390.tar.gz:
File Name
Extracted to Directory
Contains
create.dasd.sh mvs bash script that utilizes the dasdinit utility to create empty DASD volumes mvs3390.cnf conf Hercules configuration file to execute Hercules/MVS 3.8j after migration of system datasets migrate3390.script conf Hercules command script to add new DASD to configuration initial.jcl
sys3390.jcljcl Jobstreams (Job Control Language statements) submitted to MVS to prepare DASD and migrate system datasets
For Windows host Operating Systems, mvsMigrate3390.zip:
File Name
Extracted to Directory
Contains
create.dasd.bat mvs Windows bat script that utilizes the dasdinit utility to create empty DASD volumes mvs3390.cnf conf Hercules configuration file to execute Hercules/MVS 3.8j after migration of system datasets migrate3390.script conf Hercules command script to add new DASD to configuration initial.jcl
sys3390.jcljcl Jobstreams (Job Control Language statements) submitted to MVS to prepare DASD and migrate system datasets
Unpack the archive into your mvs subdirectory. The new create.dasd script will replace the existing one; all the prior functionality remains, there is simply one more group of DASD that may be created with the script. The Hercules configuration file and the Hercules script will be added to the conf subdirectory. The four jobstreams will be added to the jcl subdirectory.
 The clock time required to complete the steps below should be
approximately 15 minutes. The sum of the clock time for the three batch
jobs is 2.07 minutes, so I have included a generous amount of 'user' time in
this estimate.
The clock time required to complete the steps below should be
approximately 15 minutes. The sum of the clock time for the three batch
jobs is 2.07 minutes, so I have included a generous amount of 'user' time in
this estimate.
The batch jobs which will copy the system datasets utilize programs contained on SYSCPK. As I was developing the jobs, it became obvious that the version of ZZRELINK in SYSC.LINKLIB was not link edited as authorized, which is a requirement for moving some of the system libraries. So version 1.36, dated 05/17/2024 (or later), is required. If your version is not at that level, download the current version from ../downloads/archives/SYSCPK.tar.gz [24.4 mb MD5: 5c3628517cac1df10b1a63d88ca3bb3f]; unpack the 3350 DASD image inside and install to your dasd subdirectory.
TSO and VTAM must not be running during the migration.
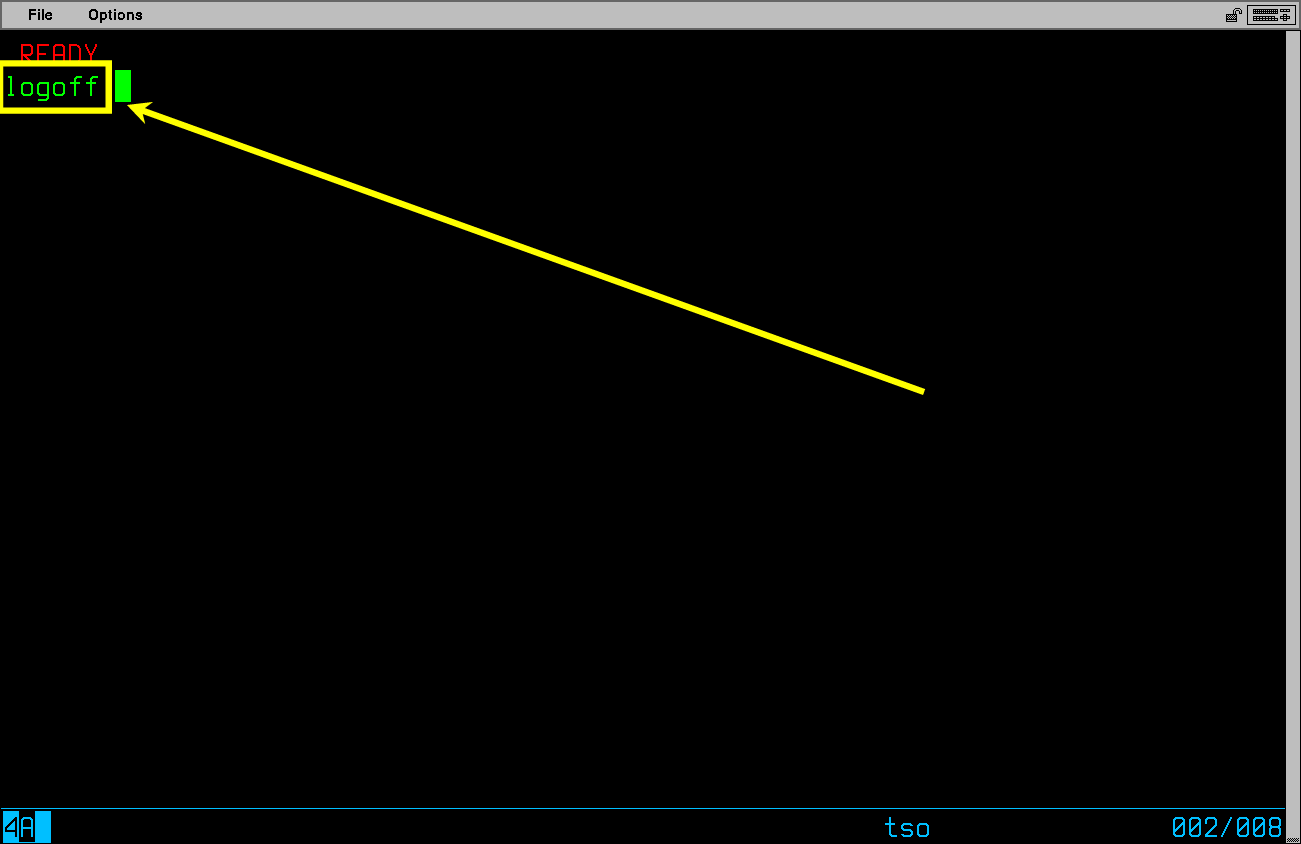
If an application is running, such as RPF or QUEUE, you must end those to return to the TSO READY prompt. Then you should log off all TSO sessions you have running with the TSO LOGOFF command:
When you log off of TSO the tn3270 client window will again display the Network Solicitor screen.
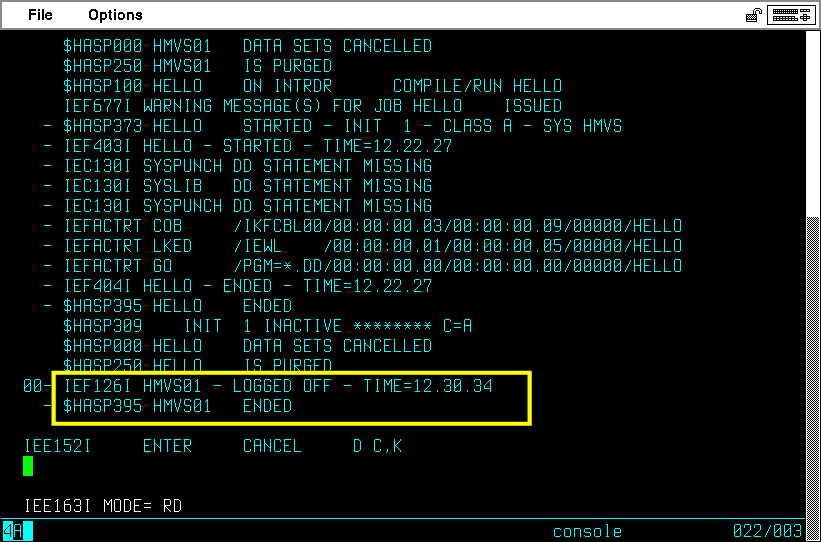
The MVS console will issue messages indicating your TSO User ID has logged off:
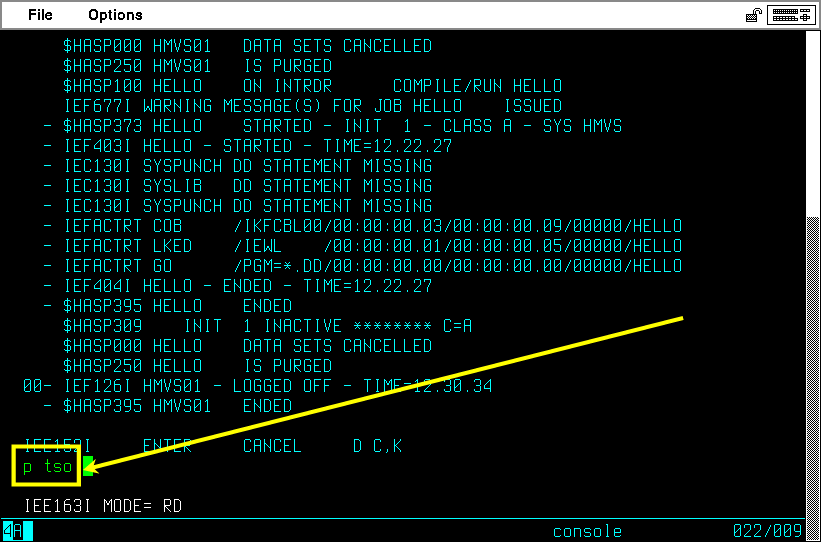
To shut down TSO, on the MVS console, type P TSO and press Enter:
If you have properly logged off all TSO user sessions, the shutdown will be quick and without fuss.
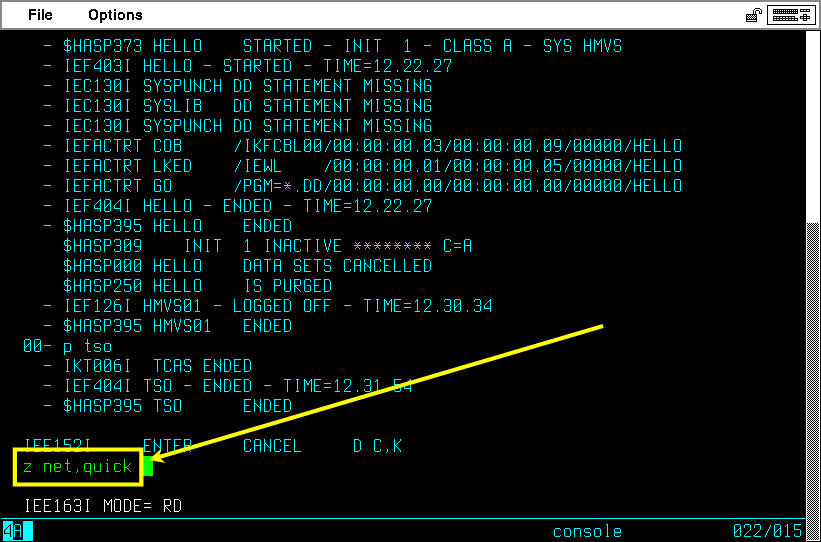
TSO will terminate. Then to shut down VTAM type Z NET,QUICK and press Enter:
VTAM will terminate. At this point, the only program running on MVS should be JES2, which is the environment we require to proceed.
The updated create.dasd script in the mvsMigrate3390 archive will create an additional group of DASD volumes:
On a Linux system, open a terminal window in the mvs directory and type the command:
./create.dasd.sh migrate3390
and press Enter. The argument 'migrate3390' instructs the script to produce the six DASD volumes required for this step. The script will execute, creating the six DASD volumes. The output of the script on my (Linux) system is shown below:
On a Windows system, open a command prompt window in the mvs directory and type the command:
create.dasd.bat migrate3390
and press Enter. The argument 'migrate3390' instructs the script to produce the six DASD volumes required for this step. The script will execute, creating the six DASD volumes. The output of the script on a borrowed Windows 7 system is shown below:
Next the six new DASD volumes created above must be identified to Hercules. I have provided a script to do that. On the Hercules console, type script conf/migrate3390.script and press Enter.
As with all new DASD, the Hercules dasdinit utility only builds the DASD image. The Volume Table of Contents and other structures are missing. The ICKDSF13 utility is necessary to initialize 3390 DASD and the ICKDSF utility is necessary to initialize 3350 DASD. The VS2RES 3390 volume also needs IPL bootstrap records written to it, which ICKDSF13 will do.
After the new DASD are initialized, they must be placed online to MVS (VARY command) and mounted as Private (MOUNT command), so that nothing will be written to the volumes other than datasets specifically targeted to them.
Finally, a User Catalog must be created on VS2RES which will become the Master Catalog when MVS 3.8j is IPLed from the volume.
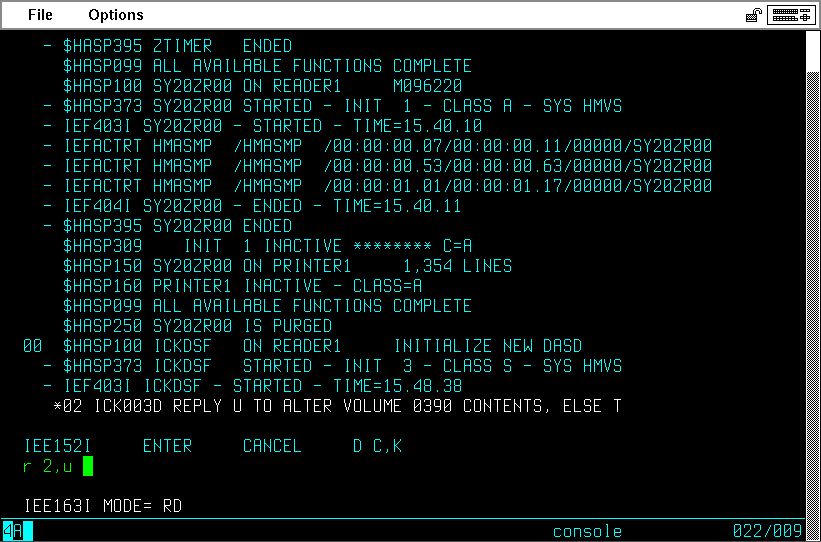
I have supplied a single jobstream - initial.jcl - that will achieve all of these steps. At the Hercules command prompt in the Hercules console, enter: sh ./submit.sh jcl/initial.jcl [on Windows: sh submit jcl\initial.jcl] and press Enter.
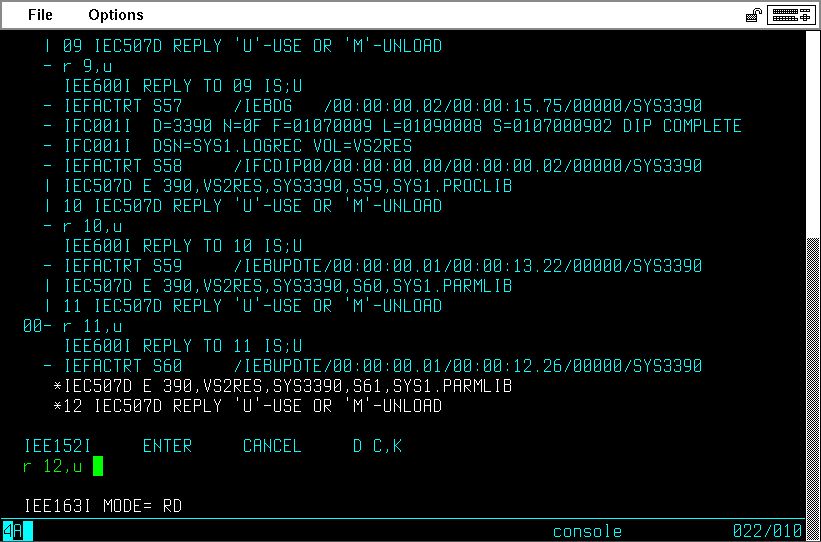
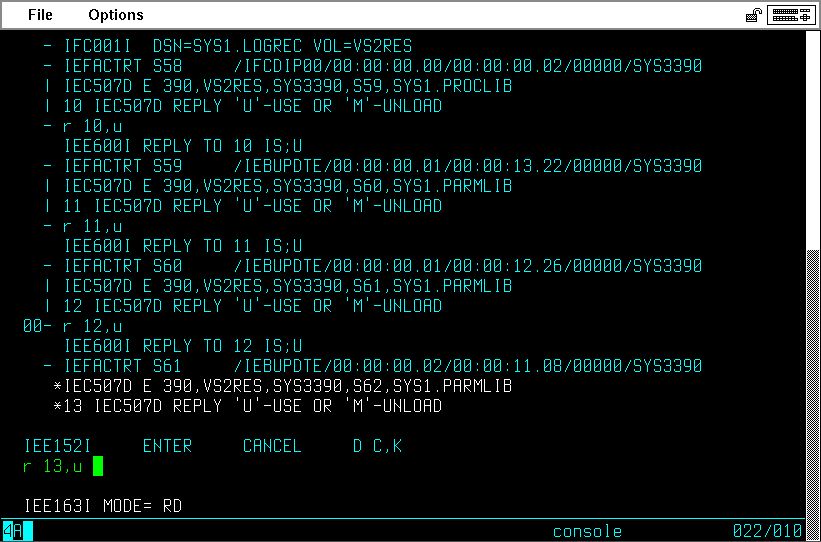
As with earlier DASD initialization, you will be presented a message requiring a response for each volume (390, 391, 350, 351, 352, 353):
Respond to each of these six messages with R nn,U.
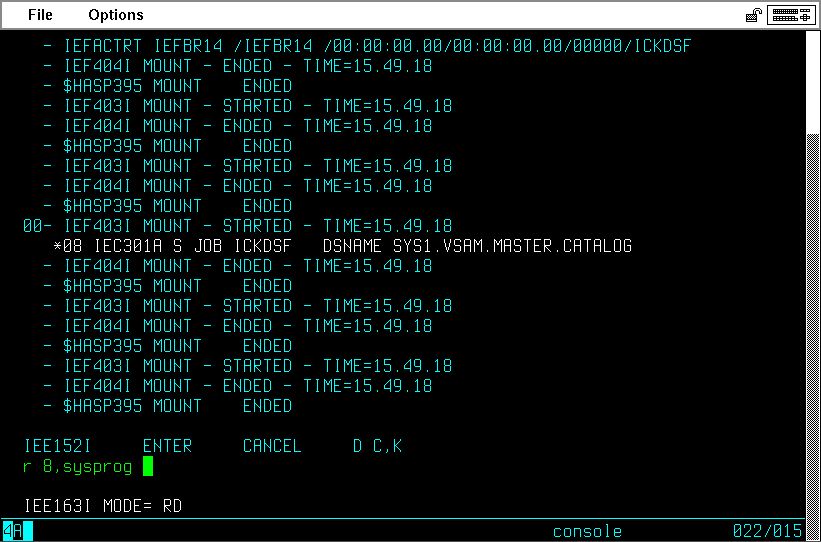
After the volumes are initialized, a secondary job will be submitted to the internal reader that has the same name. This job will Vary the six volumes online, Mount them as private, and create the User Catalog.
The User Catalog - SYS1.VS2RES.MASTER.CATALOG - is created in the Master Catalog of the running system on MVSRES, which is password protected, so you will receive a message requiring a response before this User Catalog will be created:
Respond to this message with R nn,sysprog.
Both ICKDSF jobs take 0.28 minutes to run, which on your system may be longer or shorter, depending upon how long the system waits for response to outstanding console messages. The expected completion codes are:
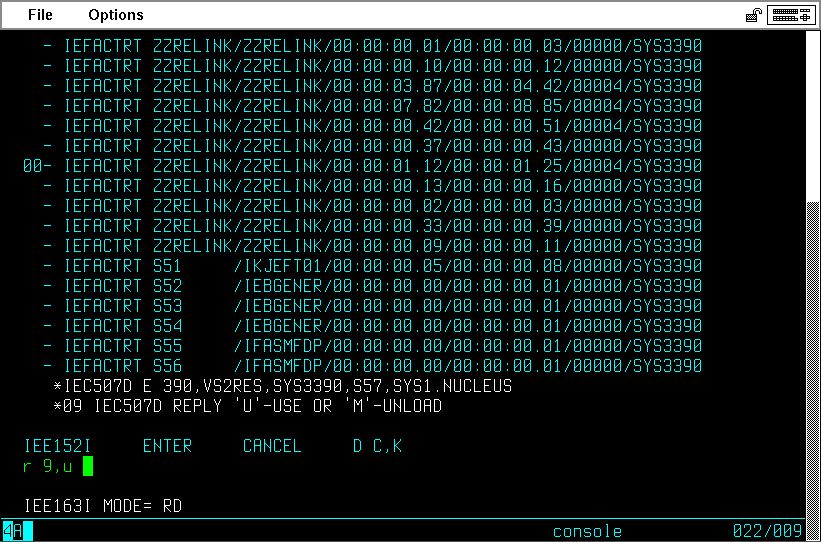
There is only a single job left to run ... it does everything else. At the Hercules command prompt in the Hercules console, enter: sh ./submit.sh jcl/sys3390.jcl [on Windows: sh submit jcl\sys3390.jcl] and press Enter.
The job completes a lot of work and I heavily annotated the JCL with comments as I was writing it, so if you are interested, you can read through the JCL. But you probably won't have time to read through the entire job before it completes.
As I put this job together, I decided to return to IBM's design and included expiration dates on most of the system datasets. The date of 99/365 should ensure no unintentional deletion or modification of the datasets until long after any of us cares. But it does mean that during the job's execution you will receive some messages requiring a response to proceed whenever a modification is about to be made to one of these system datasets.
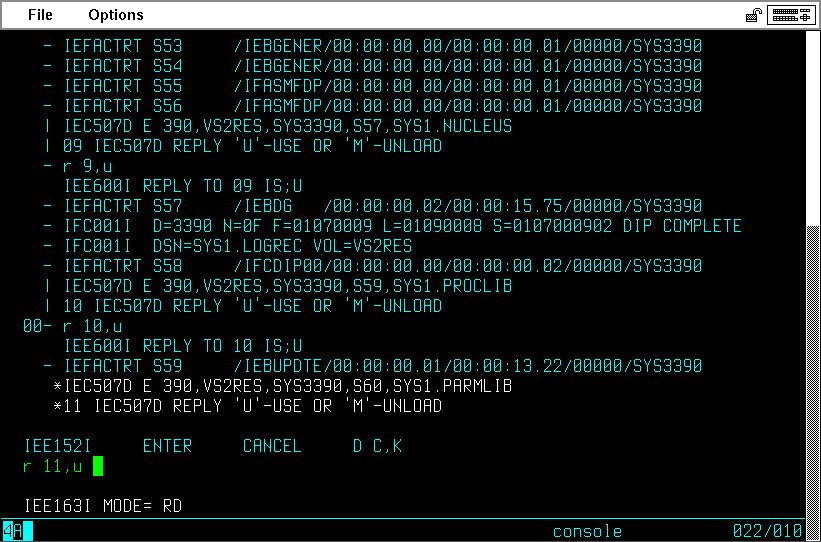
For all of these messages, the response is R nn,U.
This message is issued when the SYSCATLG member of the SYS1.NUCLEUS dataset is being updated to reflect the name of the Master Catalog and volume serial:
This message is issued when the SMFDUMP member of the SYS1.PROCLIB dataset is being updated to reflect the target volume:
You may also notice just above this message is the message issued by IFCDIP00 as the SYS1.LOGREC dataset is initialized.
This message is issued when the IEAAPF00 member of the SYS1.PARMLIB dataset is being updated to change the volume serial for three system datasets:
This message is issued when the JES2PM00 member of the SYS1.PARMLIB dataset is being updated to change the volume serial for the JES2 checkpoint and spool datasets, and to update the number of spool volumes:
This message is issued when the VATLST00 member of the SYS1.PARMLIB dataset is being updated to change the volume serial and device type for several system volumes:
Also, some volumes that are no longer being used are removed from VATLST00.
The SYS3390 job takes 1.76 minutes to run, which on your system may be longer or shorter, depending upon how long the system waits for response to outstanding console messages. The expected completion codes are:
As with previous jobsteps where system library members are being processed by the Link Editor, a 0004 return code is sometimes expected.
Note: When I ran the job from which these return codes were captured, it was against a newly generated MVS 3.8j system. If you run sys3390.jcl against a system that has been running for some time, you may receive addtional 0004 return codes in addition to those shown above. This is normal and to be expected.
That is all there is to the migration, so it is time to ...
On the MVS console, issue the commands:
$pjes2 to begin termination of JES2. Allow it time to drain its processes and shut down.
z eod to write records to open datasets.
quiesce to finalize shutdown and place system in wait state.
On the Hercules console, issue the command:
quit to terminate Hercules.
Close tn3270 client windows.
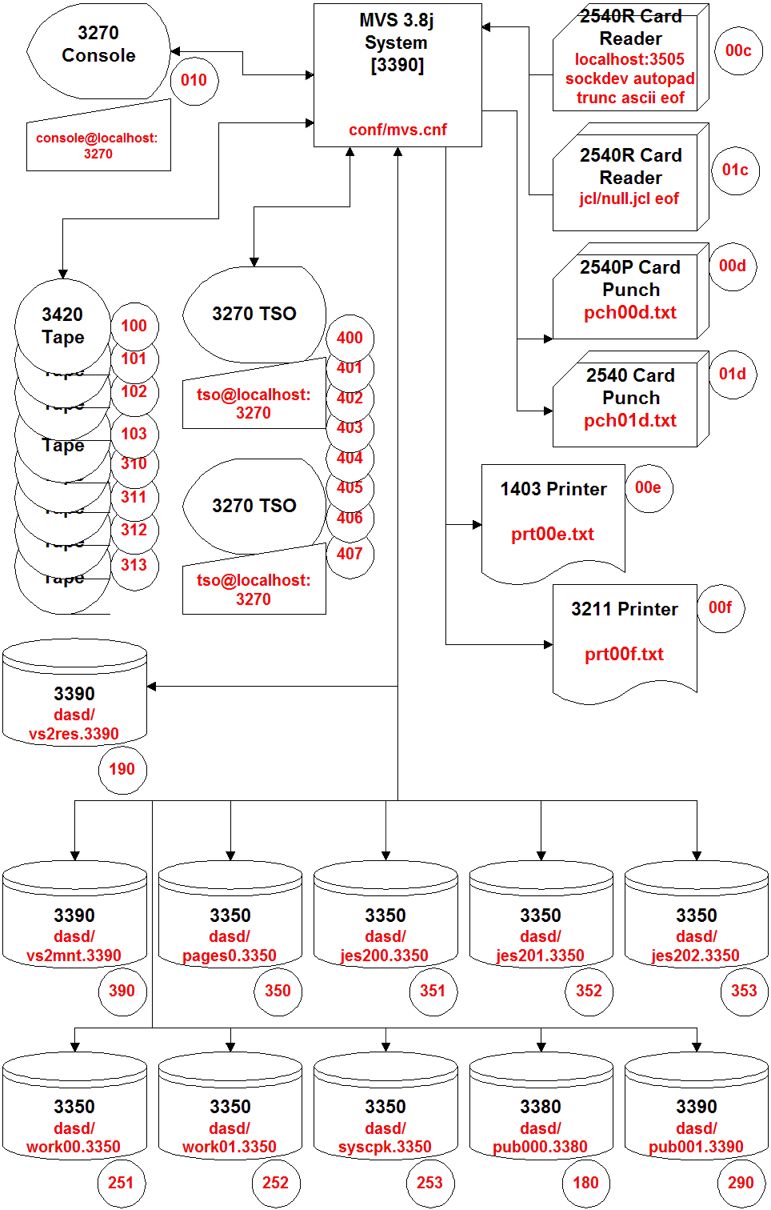
You are ready to IPL the MVS 3.8j system that now resides on 3390 DASD. I have supplied a new Hercules configuration file - mvs3390.cnf - which creates an emulated system that represented graphically looks like this:
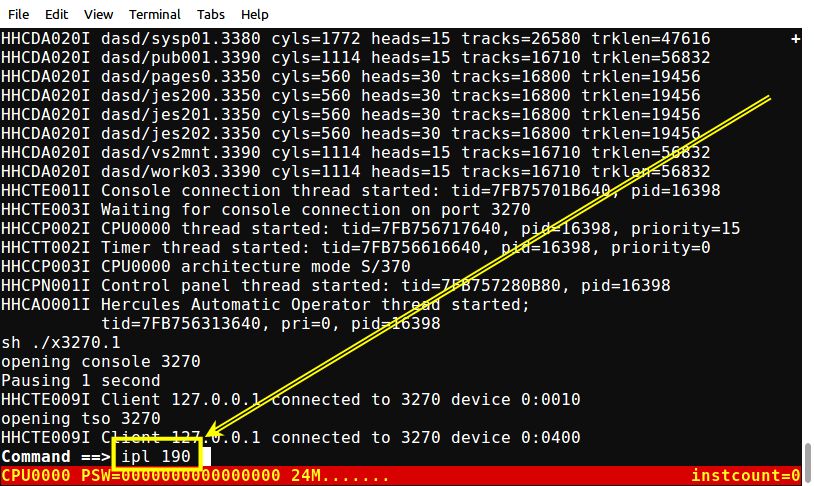
Start Hercules from a host command window with the command: hercules -f conf/mvs3390.cnf.
In another host command window, start a tn3270 client and connect to localhost, port 3270, group name is console. The command I use on my Linux system is:
x3270 -model 3279-2 -efont terminus-20 console@localhost:3270 &
This will be the MVS console.
In another host command window, start a tn3270 client and connect to localhost, port 3270, gorup name is tso. The command I use on my Linux system is:
x3270 -model 3279-2 -efont terminus-32 tso@localhost:3270 &
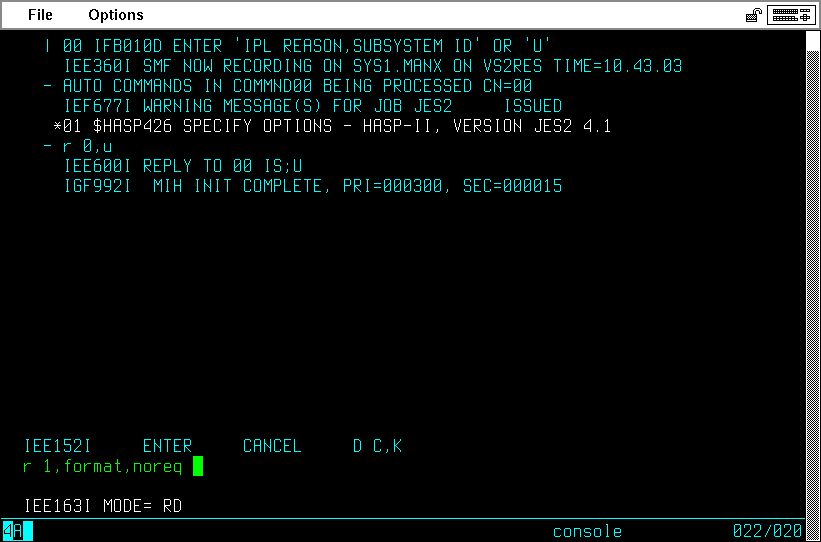
At the Hercules command prompt in the Hercules console, enter: ipl 190 and press Enter: [Careful not to make the mistake to ipl from x'150'!!!]
Because this is the first time this system has been IPLed, specify R 0,clpa:
Also, for the first JES2 prompt, specify R 1,format,noreq:
You may notice that there are now three spool datasets being formatted. You have a lot of spool space available.
Since the checkpoint dataset is also brand new, you will have to respond Y to the two messages regarding checkpoint dataset lock and checkpoint record change.
And, just like that, you have an MVS 3.8j system residing mostly on 3390 DASD.
All of the datasets are exactly as they were on the 3350 DASD, except that libraries have been created at optimum blocking for 3390 DASD.
If you plan to continue using this configuration, you may delete the old volumes from the dasd subdirectory: MVSRES.3350, MVS000.3350, SMP000.3350, SPOOL1.3350, PAGE00.3350.
Update 05-29-2024: It is early for the first update, but Marco Verpelli reported that SYS1.UMODLIB was not allocated on VS2MNT. The reason is that the library contained no members, so ZZRELINK just refused to create an empty library. This library is only used for applying modifications to the system, and only modifications written to specifically use this library during the application. To allocate the library, grab the jobstream: alloc.umodlib.jcl (output from the job: alloc.pdf).
As promised, this link will return you to IPL the Newly Created MVS 3.8 at exactly the place you left from to come here.
I hope that you have found my instructions useful. If you have questions that I can answer to help expand upon my explanations and examples shown here, please don't hesitate to send them to me:

This page was last updated on February 11, 2026 .